

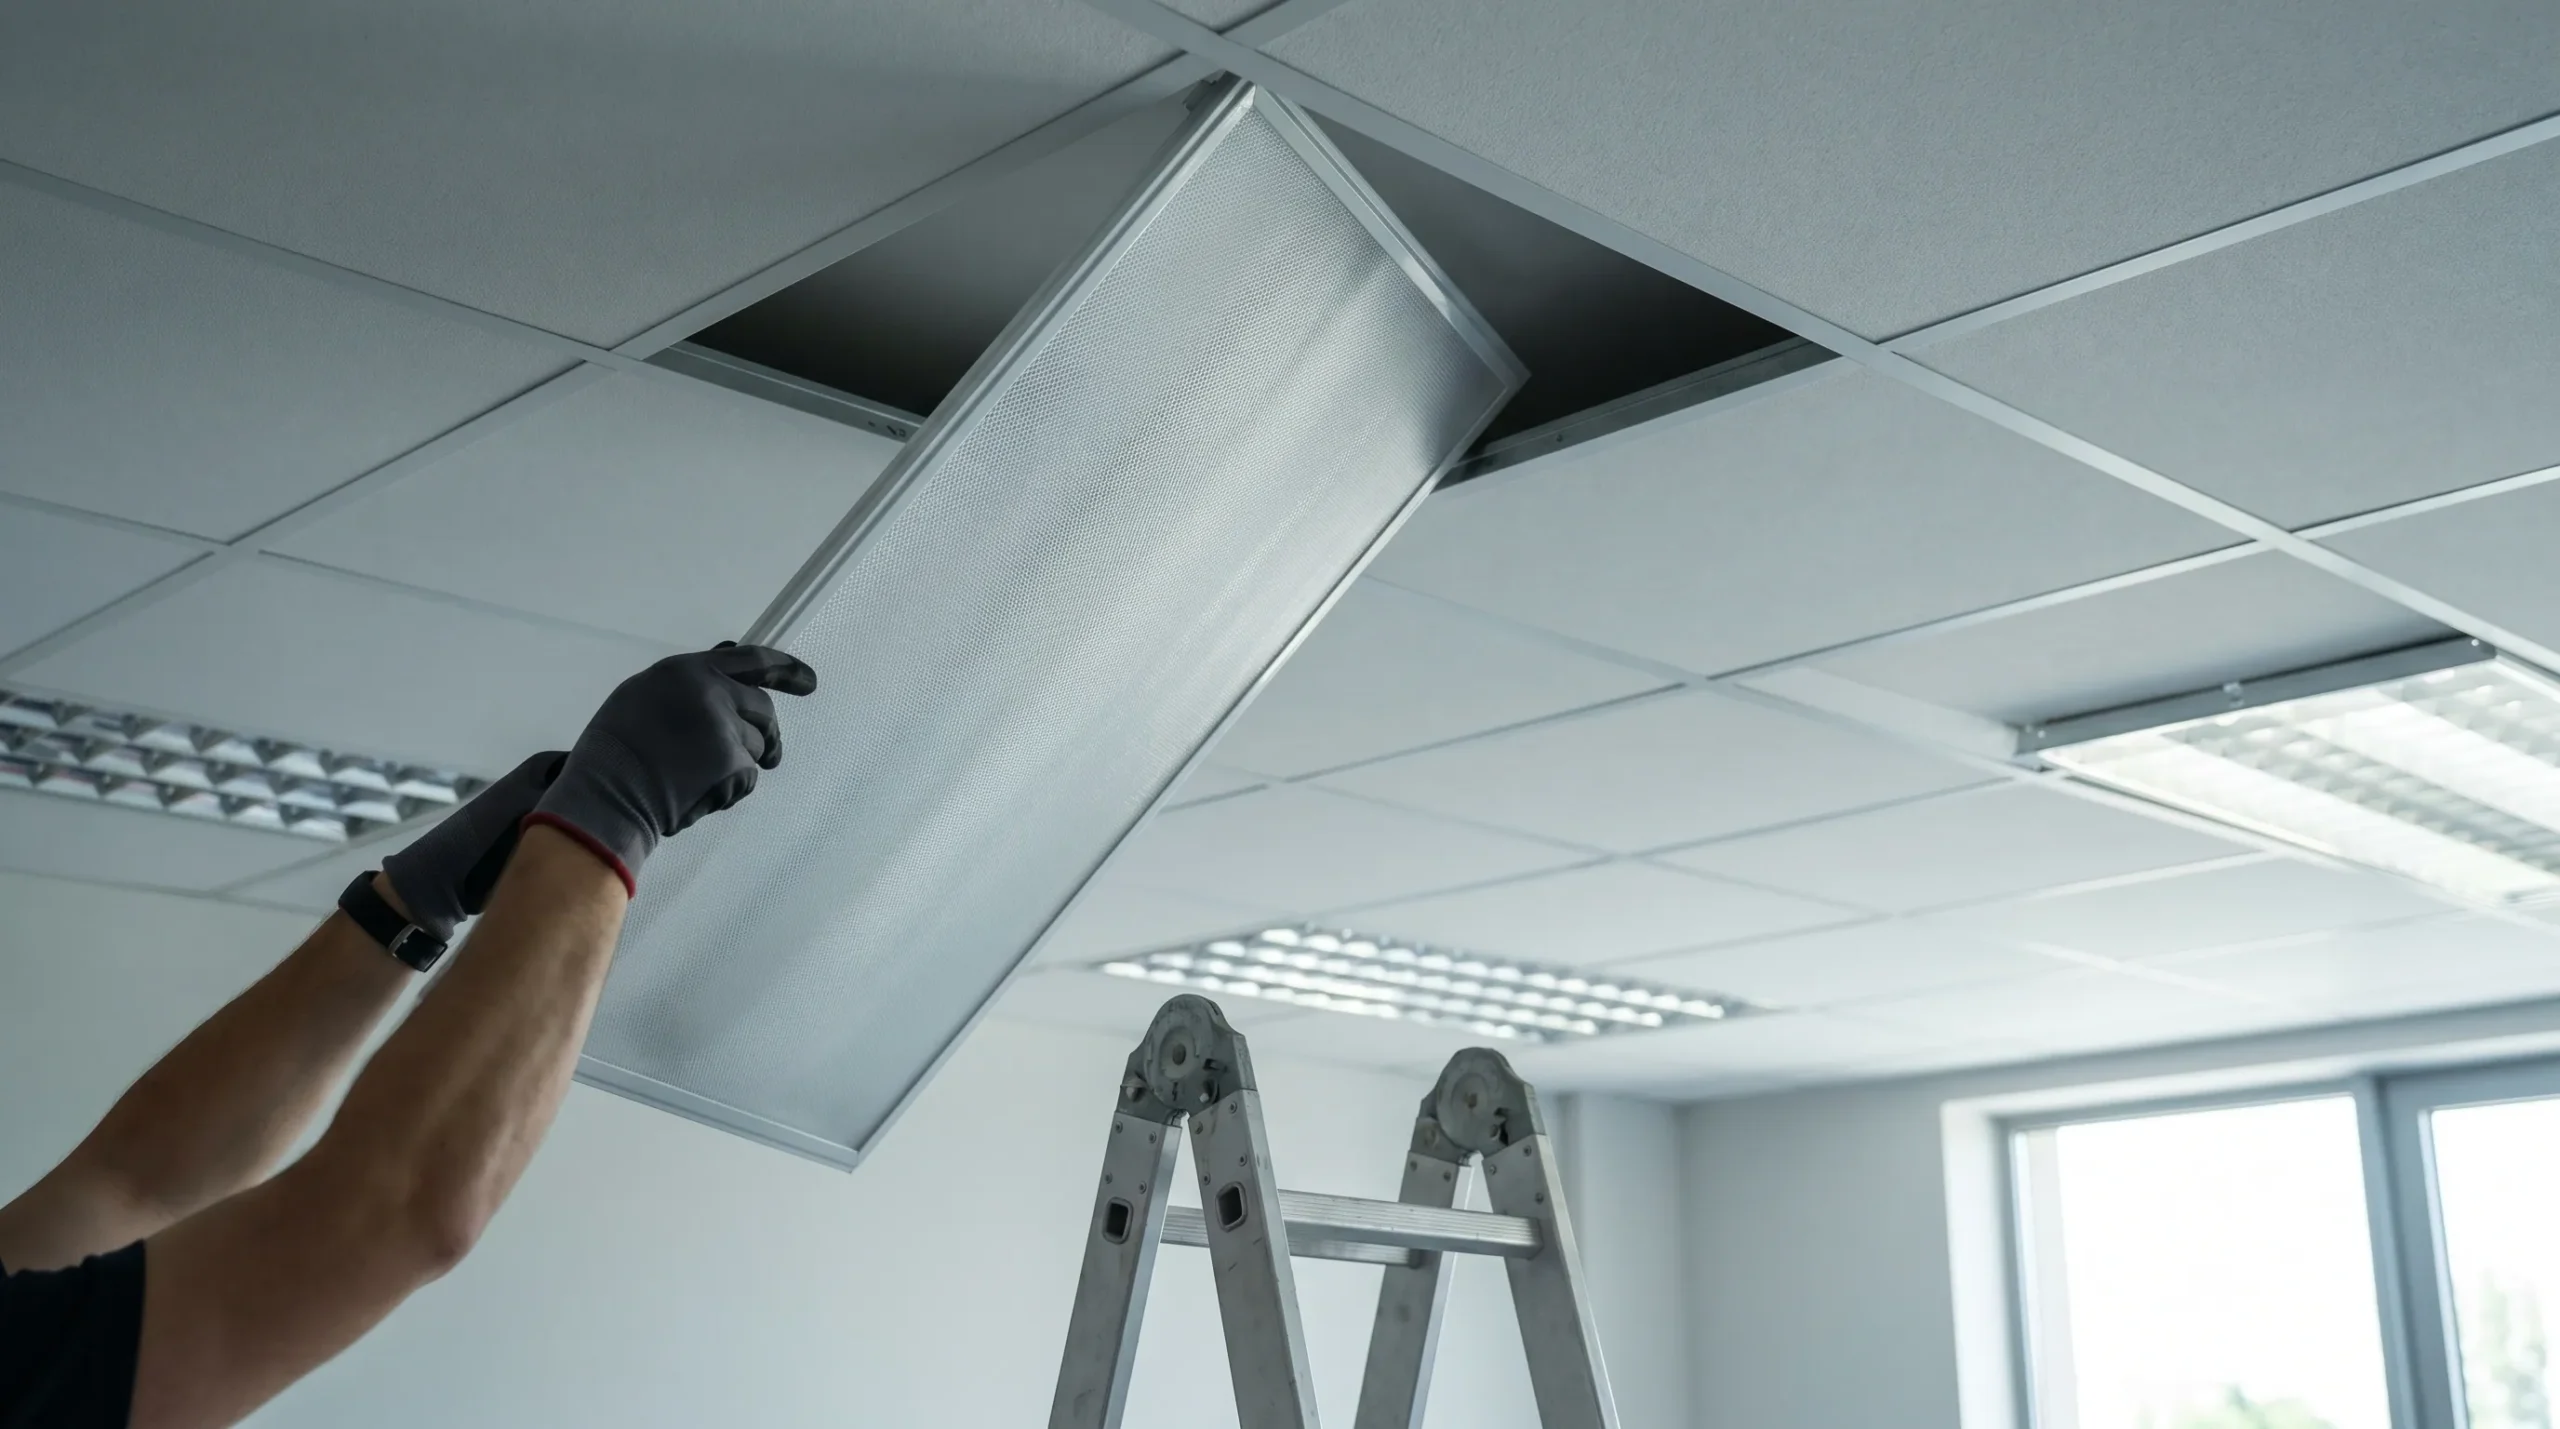
Without cracking the plastic, dropping the panel, or damaging the fluorescent light fixture? In most cases, the answer depends on one thing first: the type of cover you have. Some fluorescent light covers are wraparound lenses that flex inward and drop from the sides. Others are flat acrylic covers that lift and angle out of a frame. In offices and commercial buildings, you may be dealing with a drop ceiling light cover, troffer lens, or diffuser panel with tabs, clips, or a hinged frame.
That is why many people struggle with safe removal of fluorescent light covers. They pull down when the cover actually needs to slide. They force one edge when there is a hidden retaining clip, spring clip, or end cap holding it in place. And if the cover is old, yellowed, or brittle, a little too much pressure can turn a simple bulb change into a fluorescent light cover replacement project.
This guide walks you through how to remove fluorescent light covers step by step, using the right method for each common style. You will also learn what to do when a fluorescent light cover is stuck, how to access the fluorescent tubes or ballast safely, how to measure for a replacement lens or replacement diffuser, and when it makes more sense to replace fluorescent lighting with LED fixtures instead.
Before You Start: Safety Steps and Tools You’ll Need
Before you touch a plastic ceiling light cover, turn off power at the circuit breaker, not just the wall switch. That matters because some older fixtures are wired in ways that can still leave live components inside the housing. A quick check with a voltage detector adds an extra layer of safety, especially if you plan to do more than remove the cover.
Let the fluorescent bulbs cool for a few minutes if the light was recently on. Then position a standard A-frame ladder or another stable step ladder so you are not reaching awkwardly overhead. Good stable ladder positioning matters because one hand often needs to support the diffuser while the other releases a tab, lip, or clip.
If the cover looks old, cloudy, or brittle, wear safety glasses and cut-resistant gloves. A cracked acrylic light cover can split suddenly around the corners. Keep a soft cloth nearby so you can set the panel down without scratching it, and have a cordless screwdriver ready in case the cover is held by screws. In a few fixtures, wire caps, a metal cover, or a center mounting bracket may also be visible once the panel is off.
The goal is simple: work slowly, support the cover evenly, and never force a panel that seems stuck for no reason. There is almost always a reason.
First, Identify Which Type of Fluorescent Light Cover You Have
The biggest mistake people make is assuming all fluorescent light covers come off the same way. They do not. If you correctly identify which type of covers you have, the removal process becomes much easier.
A wraparound fluorescent light cover is the classic curved plastic lens that extends down both sides of the fixture. It often appears in kitchens, garages, laundry rooms, and utility spaces. These covers usually flex inward slightly so one side can be lowered and released.
A flat acrylic cover or plastic shade cover is more like a flat sheet sitting inside a frame or ledge. Some lift up and angle out. Others slide a little before dropping free. This style is common in older homes.
A drop ceiling light cover or troffer lens is usually found in offices, schools, and commercial settings. These may be flat panels, prismatic diffusers, egg crate diffusers, or hinged frames integrated into a suspended ceiling system.
Some fixtures also use visible screws, hidden snap tabs, spring clips, or retaining clips. If you see hardware at the ends or along the sides, it is probably not a simple pull-down cover.
Once you know the style, the rest of the job becomes much more predictable.
How to Remove a Wraparound Fluorescent Light Cover?
A wraparound cover is one of the most common styles, and it is also one of the easiest to damage if you rush. To remove it, stand centered under the fixture and place both hands on the lower edges of the lens. Support the cover evenly so it does not twist.
Most wraparound covers release when you gently push one long side inward toward the fluorescent fixture. This slight flex creates enough space for that edge to drop below the lip of the housing. Once one side comes free, lower it carefully and then slide or angle the other side out.
This is the usual method for how to remove a wraparound fluorescent light cover, but not every fixture is identical. Some models include end caps on the fluorescent fixture, and those may need to be loosened or removed first. If the cover will not flex enough, stop and inspect the ends. Hidden clips or a small internal ledge may be preventing movement.
Older plastic can be much less forgiving than newer polycarbonate or acrylic materials. If the cover is yellowed, bowed, or already cracked at one corner, do not bend it aggressively. A fluorescent diffuser stuck on one side often means the opposite edge is still caught under a lip or trapped by dust and paint buildup.
When the cover comes free, lower it with both hands and place it on a soft surface. This is the safest method if you are wondering how to remove fluorescent light covers without breaking them.
How to Remove a Flat Acrylic or Plastic Ceiling Light Cover?
If your fixture has a flat acrylic cover or flat plastic ceiling light cover, the panel usually sits inside a frame or recess rather than wrapping around the sides. That means the motion is less about flexing and more about lifting, tilting, and lowering.
Start by supporting one side with your hand. Gently push the panel upward to create clearance, then angle one edge downward and out of the frame. Once one side clears the lip, the rest of the panel should follow. This is the standard approach for how to remove plastic ceiling light cover styles and many older kitchen fixtures.
The trouble starts when the cover is brittle. A yellowed acrylic plastics panel can crack with surprisingly little pressure. If you suspect the panel is fragile, move slowly and avoid bending it from the middle. Support it closer to the edges where it is stronger.
If the panel does not lift, inspect the frame carefully. Some flat covers have small screws, tabs, or a decorative trim piece that must be removed first. Others are lightly painted into place after years of ceiling work, which can make a simple panel seem permanently fixed.
If you are trying to learn how to remove the plastic shade cover from a fluorescent light and nothing moves, the safest approach is to stop and check every edge before applying more force.
How to Remove a Drop-Ceiling Troffer Cover or Diffuser Panel?
In offices, schools, medical spaces, and other commercial settings or institutional settings, fluorescent fixtures are often built into a drop ceiling. These are commonly called troffers, and the drop ceiling light cover may open in more than one way.
Some troffer covers are hinged. In that case, one side may swing down after you release a latch or frame lever, sometimes opening to about a 90-degree angle. Others are simple lay-in panels that lift slightly, shift to one side, and angle down through the ceiling grid opening. A third style uses clips or tabs at the corners.
If you need how to remove a drop ceiling light cover instructions, the best first step is to look for a visible seam, hinge point, or latch. Never yank straight down on a troffer panel. It may be supported by a metal frame, and forcing it can bend the frame or crack the lens.
An egg crate diffuser or louvered light cover is often lighter than a prismatic lens, but it can still snag on the frame. Support the panel evenly, release any spring clips, and rotate it out only as much as needed. In many office troffers, the right motion is lift, tilt, then lower.
This is also the category where office troffer cover removal causes the most frustration, especially when dust, warped plastic, or ceiling paint interfere with the fit.
How to Remove a Screw-On or Clip-On Fluorescent Cover?
Not every ceiling light cover is designed to flex or slide. Some are attached with visible screws, while others are held by hidden clips on a fluorescent light cover.
If you see screws at the ends or sides, support the cover first and then loosen the screws carefully. Remove one side while holding the panel so it does not drop suddenly. A second person helps here, especially on larger fixtures.
If there are no screws, look for snap tabs, retaining clips, or narrow openings where a tool-free release is possible. Many clip-on covers need one edge pressed inward while a clip is disengaged. Others are snapped into place and release only when pressure is applied at a specific point.
This is why people often think the cover is stuck when it is actually locked in. Before pulling down, inspect the fixture from all angles. The extra thirty seconds can save the entire replacement cover.
What to Do If the Fluorescent Light Cover Is Stuck?
A fluorescent light cover stuck in place is usually caused by one of five things: hidden hardware, paint along the edge, dust packed into the channel, warped plastic, or old brittle material that no longer flexes well.
Start by checking whether one side moves more than the other. A fluorescent diffuser stuck on one side often means the opposite side is still under a lip or clipped into the housing. If the cover seems to shift but not release, look for end caps, corner tabs, or a center retention point.
Dust and grease can also make a panel feel glued into place, especially in a kitchen. Run your fingers along the seam. If the edge is sealed with paint, carefully score the paint line before trying again. If the cover is bowed or warped, support it close to the stuck area and use gentle, even pressure rather than twisting from the middle.
What you should not do is pry hard on a single corner. That is how old fluorescent cover cracking usually happens. If the panel is severely yellowed or brittle, it may already be on borrowed time. In that case, it can be smarter to plan for a cracked lens replacement rather than trying to preserve a failing cover at all costs.
A soft mallet can sometimes help tap a metal frame lightly, but it should never be used directly on the plastic lens. The safe rule is simple: if force is increasing and progress is not, stop and reassess.
After the Cover Comes Off: Changing Bulbs, Cleaning, or Accessing the Ballast
Once the cover is removed, you can change the fluorescent tubes, inspect the inside of the fluorescent light fixture, or clean the panel before reinstalling it. If you are replacing a tube, rotate it carefully until the pins align with the slot, then lower it out. Handle old tubes gently, since they can break if twisted too far.
This is also a good time to wipe dust, grease, and dead insects from the housing. If you are wondering how to clean fluorescent light covers, use mild soap and water on the diffuser and avoid harsh chemicals that can cloud acrylic. The same advice applies to how to clean acrylic diffuser panels: soft cloth, gentle cleaner, and no abrasive pads.
You may also see the ballast, wiring, or internal fixture wiring once the cover is off. If your goal was ballast access, that is fine for identification and inspection, but major electrical work should be left to someone qualified unless you know exactly what you are doing.
A quick cleaning and bulb swap often restores brightness, but if the lens is cloudy, warped, or damaged, you may need a replacement diffuser to get the best light output again.
How to Measure for a Replacement Fluorescent Light Cover?
If the old cover cracks or no longer fits properly, accurate measurement is the key to finding the right fluorescent light cover replacement. Many people measure the outside of the fixture and accidentally order the wrong part. What matters is how the cover fits inside the housing or against the support lips.
Measure the width, length, and height or depth of the cover. If it is a wraparound style, note how far the lens extends down the sides. If there are hooks, tabs, or ledges, pay attention to the inside width between hooks rather than only the outer dimensions. This distinction between outside dimensions vs inside opening is one of the most common ordering mistakes.
Also check the fixture itself for name brands, fixture numbers, stickers, or stamped part codes. In many cases, replacement by fixture model number is more reliable than trying to guess by appearance. A cover described as 6″ x 26 3/4″ x 4″ may look similar to another lens online, but a small difference in lip shape or depth can make it unusable.
Here is a simple reference table:
| What to Measure | Why It Matters |
|---|---|
| Length | Ensures the cover spans the fixture correctly |
| Width | Helps match side fit and internal opening |
| Height / Depth | Critical for wraparound cover profiles |
| Clip / Hook spacing | Prevents poor fit on clip-held covers |
| Model number | Best way to confirm exact compatibility |
If the light is old and the right replacement lens is hard to find, compare the cost of a new lens with the cost of updating the whole fixture.
Should You Replace the Cover, Retrofit to LED, or Replace the Whole Fixture?
Sometimes the smartest fix is not another fluorescent cover at all. If the panel is the only damaged part and the fixture works well, a new light cover replacement may be all you need. But if the ballast is failing, the housing is rusty, the plastic is badly yellowed, or exact parts are hard to source, it may be time to replace fluorescent lighting altogether.
A fluorescent to LED conversion can improve efficiency, reduce maintenance, and eliminate the need to keep replacing old-style fluorescent bulbs. In other cases, swapping in new LED fixtures or a modern flush mount makes more sense than hunting for a hard-to-find cover.
Ask yourself three questions. Is the fixture structurally sound? Is the correct cover easy to find? Will replacing the cover still leave you with an outdated light you plan to change soon anyway? If the answer to the last question is yes, full replacement may be the better long-term move.
This is especially true in kitchens, garages, and offices where lighting quality matters and a cloudy old diffuser is already reducing brightness.
How to Reinstall the Fluorescent Cover Without Cracking It?
Reinstalling the cover is usually the reverse of removal, but it deserves care. Many people succeed in getting the panel off and then crack it while putting it back on.
For a wraparound fluorescent light cover, hook one side into the lip first, then flex the opposite side just enough to seat it. For a flat panel, lift one edge into the frame, angle the cover, and lower the remaining side into place. For troffer panels, re-engage the frame, latch, or clips before letting go fully.
Do not over-flex older plastic. If the cover resists, it may not be aligned correctly. Check the corners, the lip, and any snap tabs before applying more pressure. A good rule is to support the panel evenly until you are sure it is seated and secure.
That is the safest answer to how to safely remove and replace fluorescent light covers.
How to Dispose of Old Fluorescent Tubes and Broken Covers Safely?
If you replaced the bulbs while the fixture was open, do not throw old fluorescent tubes in the regular trash unless local rules clearly allow it. These lamps can contain small amounts of mercury, so fluorescent bulb recycling and proper mercury disposal are the safer options.
Broken plastic covers should also be handled carefully. Even a thin acrylic cover can leave sharp edges. Wrap damaged pieces before disposal and clean the area thoroughly if a bulb or lens breaks.
Adding this step protects both your home and anyone handling the waste later, and it makes your project truly complete from start to finish.
Conclusion
The safest answer to how do you remove fluorescent light covers is not “pull harder.” It is identify the cover type first, then use the right motion for that specific fixture. A wraparound lens, flat acrylic cover, and drop ceiling light cover each release differently, and knowing that difference prevents cracks, broken clips, and a lot of frustration.
Turn off the breaker, support the panel with both hands, inspect for tabs or screws, and work slowly. If the cover is brittle, cloudy, or hard to source, use the opportunity to decide whether a replacement cover, a new replacement lens, or even updated LED fixtures would serve you better in the long run.
When you approach the job methodically, removing a fluorescent cover is usually much easier than it first looks.
FAQs
Do fluorescent covers slide out or pull down?
Both. A wraparound cover often flexes inward and lowers from one side, while a flat or framed panel may lift and angle out. Troffer covers may hinge, tilt, or release from clips.
How do you remove fluorescent light covers without breaking them?
The safest method is to identify the cover style first, support it with both hands, and look for tabs, screws, or end caps before forcing anything. Slow, even pressure always beats twisting from one corner.
Why won’t my fluorescent light cover come off?
The cover may be painted in place, clogged with dust, warped, or held by hidden clips. A fluorescent light cover stuck on one side usually means another edge is still trapped under a lip or clip.
Can I remove a fluorescent light cover without taking down the whole fixture?
Usually, yes. Most covers are designed to come off independently so you can change bulbs or clean the diffuser.
What if the cover is yellow, brittle, or cracked?
That often means the plastic has aged out. In that case, a cracked lens replacement, replacement diffuser, or even a full fixture upgrade may be the best solution.
How do I find a fluorescent light cover replacement?
Measure the width, length, and height, check for fixture model numbers, and compare the profile of the old lens carefully. A close-looking part is not always the right part.
Disclaimer:
This article is for informational purposes only. Handling fluorescent light fixtures, covers, and bulbs can be hazardous. Readers should follow proper safety guidelines and consult qualified electricians for electrical work or repairs beyond basic maintenance.